Security Model
The CoreTRM Security Model allow each tenant to configure security by DataObjects, Books and Views. In addition, it also creation of new users and users permission setting.
To access security model setup go to Security Data and then to the Security Model tab.
Adding new User
Setting up DataObjects Permission
Setting up Books Permission
Setting up Views Permission
Adding new User

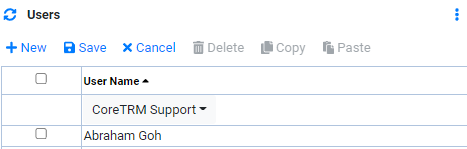
To add a user, in Users view:
- Click on
 to create a new line.
 - In Email Address, enter the email address of the user. Email address will need to be unique.
- In User Name, enter the user name of the user.
- In User Role, select the role of the user. Typically, it will be blank for all users except CoreTRM Staff. Customize role can be added, please contact CoreTRM Support.
- In Language, select the language of the user. Customize Language can be added, please contact CoreTRM Support.
- In Formatting Culture, select the Formatting Culture of the user. The Formatting Culture are "English-UK" and "English-US". Formatting Culture affect the number and date format on screen.
- In UI Theme, select the UI Theme of the user. Typically, it will be either Dark or Light Theme.
- In UI Grid CSS, select the UI Grid CSS of the user. Typically, it will be either Dark, Darker or Light CSS.
- In User Type, select the user type of the user. There are 2 type: "Online" and "Background". Online allow user to login to the system. Background is used by the system scheduler.
- In Phone Number, enter the Phone Number of the user if applicable. This is for information only.
- In Phone Country Code, enter the Phone Country Code of the user if applicable. This is for information only.
- In Locked?, tick this box to lock the user account. Once the user is locked, the user will not be able to login to the system including accessing the API.
- In Active?, tick this box to set the user active.
- Click
 to confirm creation.
 - To edit user after creation, Click
 to edit.
*The user settings are per user and it will not affect other users.*
Once a user is added, to create a password:
- From the Users view, select the user you wish to create a password.
- Next, click on
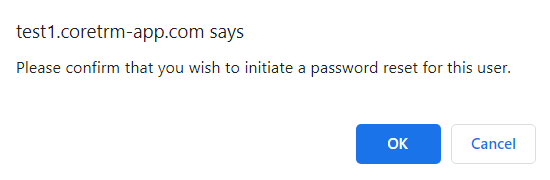
 to initiate the password reset.
 - From the pop up box, click "Ok" to confirm password rest.
- Once done, CoreTRM will generate a URL like below. Users will be able to create password using the URL below.
- Follow onscreen to create a new password.


Once a user is added, you will need to give permission the new user. One way to provision user permission is to replicate an existing security permission setting from another user. The replication will replicate DataObjects, Books and Views permission.
To replicate an existing user permission from one user to another:
- From the Users view, select the user you wish to replicate the security permission to.
- Next, click on
 to initiate assign user security permission.
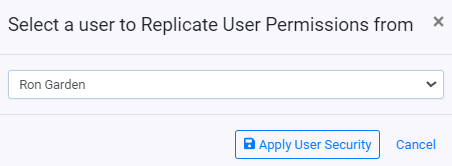
 - From the pop up box, select the user from which the security permission will be replicated from.
- Next, click on
 to confirm replication.
 - Once done, the selected user will have same DataObjects, Books and Views permission as the selected replicated from user.
Security permission are setup based on DataObjects, Books and Views. DataObject permission allow you access to read, insert, update and delete data in an DataObject. Book permission allow you access to read, insert, update or delete data belonging to a Book. View permission allow you access to Read or Write data from a view.
Setting up DataObjects Permission
CoreTRM comes with a list of default user groups of DataObject permission. The user groups are mainly categorize by functions. The user groups are Trading, Operations, Middle Office, Accounting, Trading- Approvals, User Admin and View Admin. Each user group provides default access to DataObject that the group users required to access and view their group functions. It is recommended that you setup or modified access starting from the default setup.
In other words, permission are given by group and users belonging to this group has permission to the list of DataObject in this group.
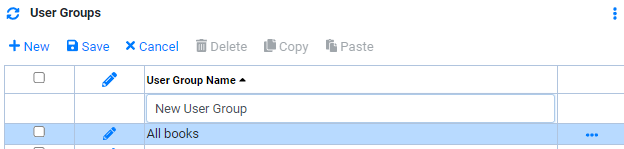
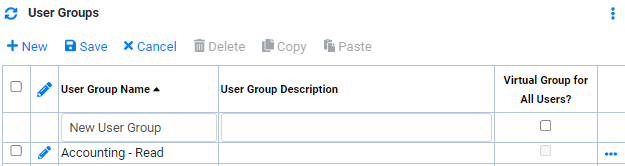
To add a new User Group:
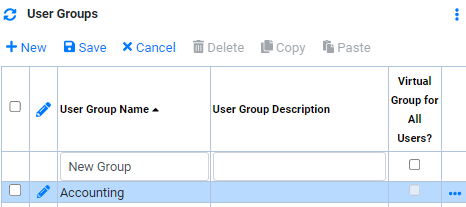
- Click on to create a new line.
- In User Group Name, enter the name of the User Group.
- In User Group Description, enter applicable description for the User Group.
- In Virtual Group for All Users?, this is used for virtual group setup.
- Click to confirm creation.
- To edit user group after creation, Click to edit.
To add or modify a DataObject in a user group:
- Select the user group from the User Groups view that you wish to add or modify a DataObject.
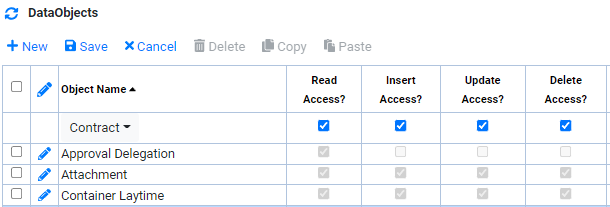
- From the DataObjects view, click on to create a new line.
- In Object Name, select the DataObject you wish to give permission to.
- In Read Access?, tick the box if read access are to be given to this DataObject.
- In Insert Access?, tick the box if insert access are to be given to this DataObject.
- In Update Access?, tick the box if update access are to be given to this DataObject.
- In Delete Access?, tick the box if delete access are to be given to this DataObject.
- Click to confirm creation.
- To edit DataObject details after creation, Click to edit.
To add or modify a user in a User Group:
- Select the user group from the User Groups view that you wish to add or modify a user.
- From the Users view, click on to create a new line.
- In User Name, select the User you wish to add to the user group.
- Click to confirm creation.
- To delete a user after creation, select the user and click
 to edit.
DataObject permission can be given to DataObject item level. If all the DataObject Item in a DataObject are to be given same permission, setting up DataObject permission is sufficient. If specific DataObject Item has different permission, it can be overriden in the DataObject Item Overrides view.
To add or modify a DataObject Item permission in a DataObject:

- Select the DataObject from the DataObjects view that you wish to add or modify DataObject Item Overrides.
- From the DataObjects Item Overrides view, click on to create a new line.
- In Item Name, select the Item you wish to give permission to.
- In Read Access?, tick the box if read access are to be given to this DataObject Item.
- In Insert Access?, tick the box if insert access are to be given to this DataObject Item.
- In Update Access?, tick the box if update access are to be given to this DataObject Item.
- Click to confirm creation.
- To edit DataObject Item Overrides details after creation, Click to edit.
Setting up Books Permission
After you have created all the books that are required by your company, you will be able to provide access to different books in here. Since all contracts and fees are entered by book, book permission is essential so that you can view and access all the contracts in the system.
If you do not required permission based on books, you can use the existing default All Books user group (or the highest hiearchy book) to give permission to the book. Alternatively, you can setup access based on books.
*Giving permission to the Parent book will give the same access to the child book.*
To add a new User Group:
- Click on to create a new line.
- In User Group Name, enter the name of the User Group.
- In User Group Description, enter applicable description for the User Group.
- In Virtual Group for All Users?, this is used for virtual group setup.
- Click to confirm creation.
- To edit user group after creation, Click to edit.
To add or modify a book in a user group:
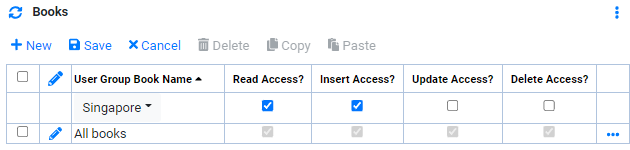
- Select the user group from the User Groups view that you wish to add or modify a book.
- From the Books view, click on to create a new line.
- In User Group Book Name, select the book you wish to give permission to.
- In Read Access?, tick the box if read access are to be given to this book.
- In Insert Access?, tick the box if insert access are to be given to this book.
- In Update Access?, tick the box if update access are to be given to this book.
- In Delete Access?, tick the box if delete access are to be given to this book.
- Click to confirm creation.
- To edit book details after creation, Click to edit.
To add or modify a user in a User Group:
to create a new line. to confirm creation. to edit.If you do not required access by book, you can directly add all the users to the All Books user group (or the highest hiearchy book group),to add or modify a user in a User Group:
- Select the user group from the User Groups view that you wish to add or modify a user.
- From the Users view, click on to create a new line.
- In User Name, select the User you wish to add to the user group.
- Click to confirm creation.
- To delete a user after creation, select the user and click to edit.
Setting up Views Permission
CoreTRM comes with a list of default user groups of View permission. The user groups are mainly categorize by views in CoreTRM (the left menu panel). The user groups are Trading, Operations, Credit, Middle Office, Accounting, Price Data, Reference Data,System Admin, User Admin and View Admin. Each user group provides default access to that group of views. The group are divided by Ready Only access or Update access. It is recommended that you setup or modified access starting from the default setup.
In other words, permission are given by group and users belonging to this group has permission to the list of views in this group.
To add a new User Group:
- Click on to create a new line.
- In User Group Name, enter the name of the User Group.
- In User Group Description, enter applicable description for the User Group.
- In Virtual Group for All Users?, this is used for virtual group setup.
- Click to confirm creation.
- To edit user group after creation, Click to edit.
To add or modify a view in a user group:
- Select the user group from the User Groups view that you wish to add or modify a view.
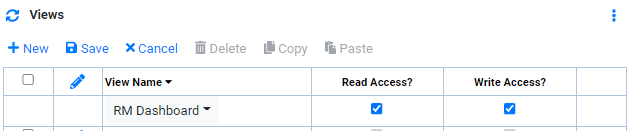
- From the Views view, click on to create a new line.
- In View Name, select the view you wish to give permission to.
- In Read Access?, tick the box if read access are to be given to this view.
- In Write Access?, tick the box if write access are to be given to this view.
- Click to confirm creation.
- To edit view details after creation, Click to edit.
To add or modify a user in a User Group:
- Select the user group from the User Groups view that you wish to add or modify a user.
- From the Users view, click on to create a new line.
- In User Name, select the User you wish to add to the user group.
- Click to confirm creation.
- To delete a user after creation, select the user and click to edit.